Setting Up a Proxy in MuLogin
MuLogin is a multi-accounting browser preferred by IT professionals and business users to efficiently manage various web services and social networks. It features robust anti-detection software that enhances user anonymity and security by evading online tracking systems.
Key features include:
- Simultaneous operation of multiple windows or tabs, each with unique profiles and accounts.
- Cookie and data storage isolation per tab or window, preventing cross-account data leakage.
- Synchronize bookmarks, passwords, and other data across profiles or devices.
- Customize UserAgent settings, including device characteristics, OS type, screen resolution, and more.
- Tools to mask the real IP address and route traffic through proxies or VPNs to maintain privacy.
- Ability to change browser fingerprints, such as time zone and language settings.
This browser is ideal for anyone seeking online privacy, including marketers, web testers, and analysts. The guide details how to configure a proxy server in MuLogin for enhanced security.
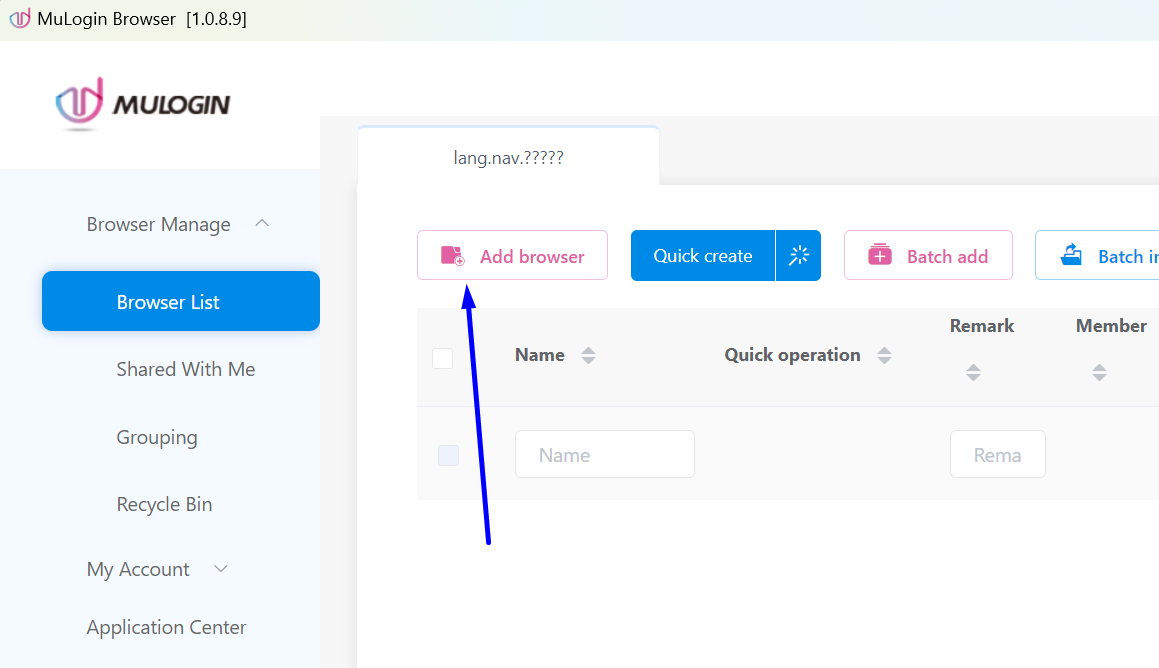
Step 1: Adding a New Browser in MuLogin
To begin working with MuLogin, first click on the "Add browser" button as shown in the screenshot below.
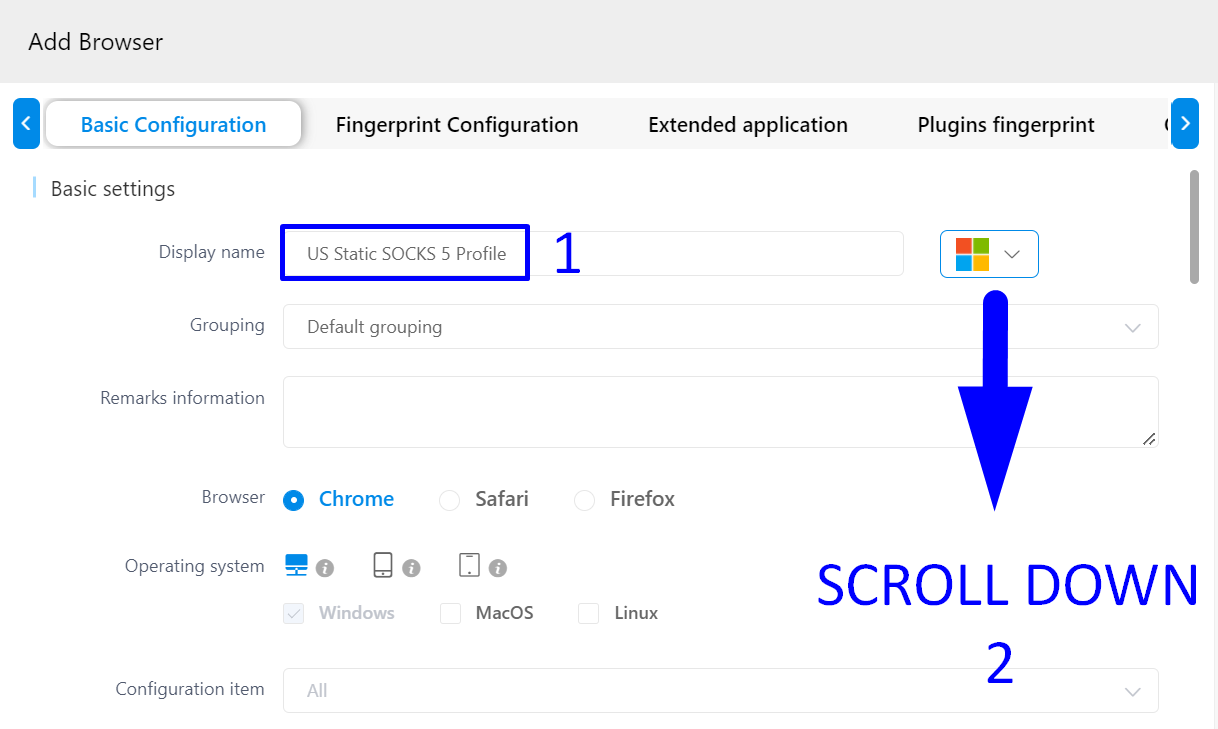
Step 2: Enter the Browser Name
Next:
- In the "Display name" field, enter the name of the browser profile.
- Scroll down to the "Proxy Settings" section.
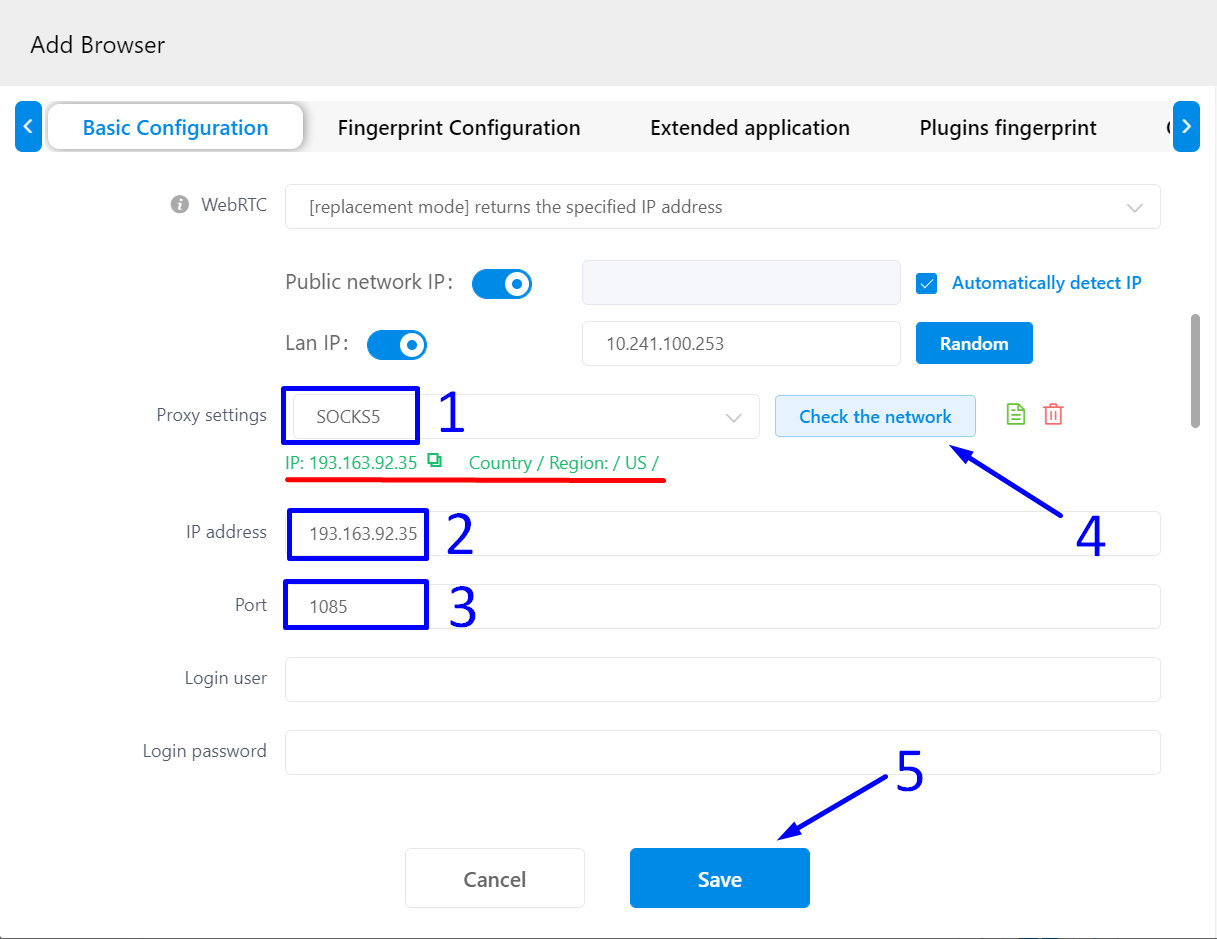
Step 3: Enter Proxy Server Details
Follow these steps to enter your proxy information:
1. In the "Proxy settings" dropdown menu, select the appropriate protocol. In our case, choose SOCKS5 for its superior anonymity and reliability.
2. Enter the IP address of your proxy.
3. Enter the port number.
4. Click the "Check the network" button to test the connection to your proxy.
If the connection is successful, a green label with your proxy's geolocation will appear, highlighted in red in our screenshot.
5. Save the settings by clicking the "Save" button.
MuLogin browser is now ready for use. Each of your actions on the internet will be carried out through the proxy you specified.
https://proxycompass.com/knowledge-base/setting-up-a-proxy-in-mulogin/


Comments
Post a Comment